Foreword
第二步,通过API实现一点点小功能
VS Code插件入门
VS Code的API目录,可以先按照大类查找,然后再找下面具体的接口
https://code.visualstudio.com/api/references/vscode-api
VS Code的API例子在下面的地址中,相关的接口可以直接看一下例子里是怎么用的,效果怎样
https://github.com/microsoft/vscode-extension-samples
具体使用进入到对应的例子目录下,然后安装包,就可以启动了
npm install
F5
获取文件路径
首先是通过插件获取到当前打开文件路径在哪里
vscode.window.activeTextEditor.document.uri.path
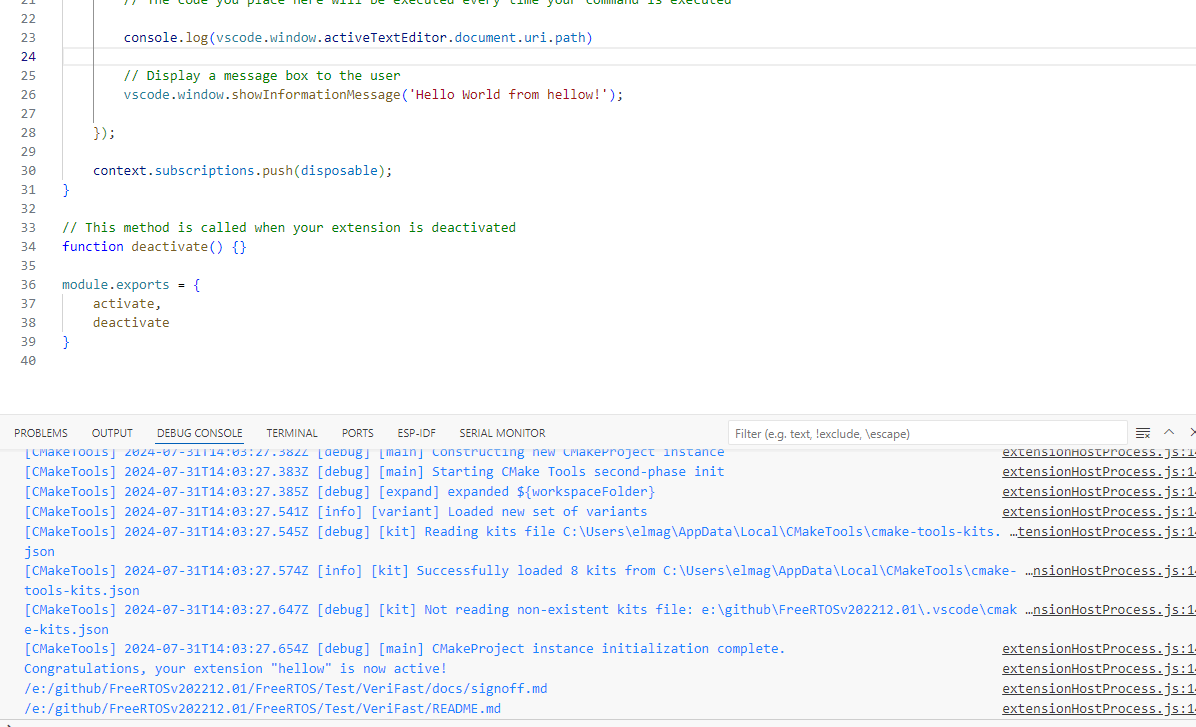
试了一下,切换文件,显示没有问题,如果没有打开路径倒是会报错,需要异常处理一下
		if(vscode.window.activeTextEditor == undefined)
		{
			console.log("cant find active text editor")
		}
		else
		{
			console.log(vscode.window.activeTextEditor.document.uri.path)
		}
还有一种路径,可能是需要当前打开的工程路径,可以通过下面这种方式获取
console.log(vscode.workspace.workspaceFolders[0].uri.fsPath)
创建一个新的显示区域
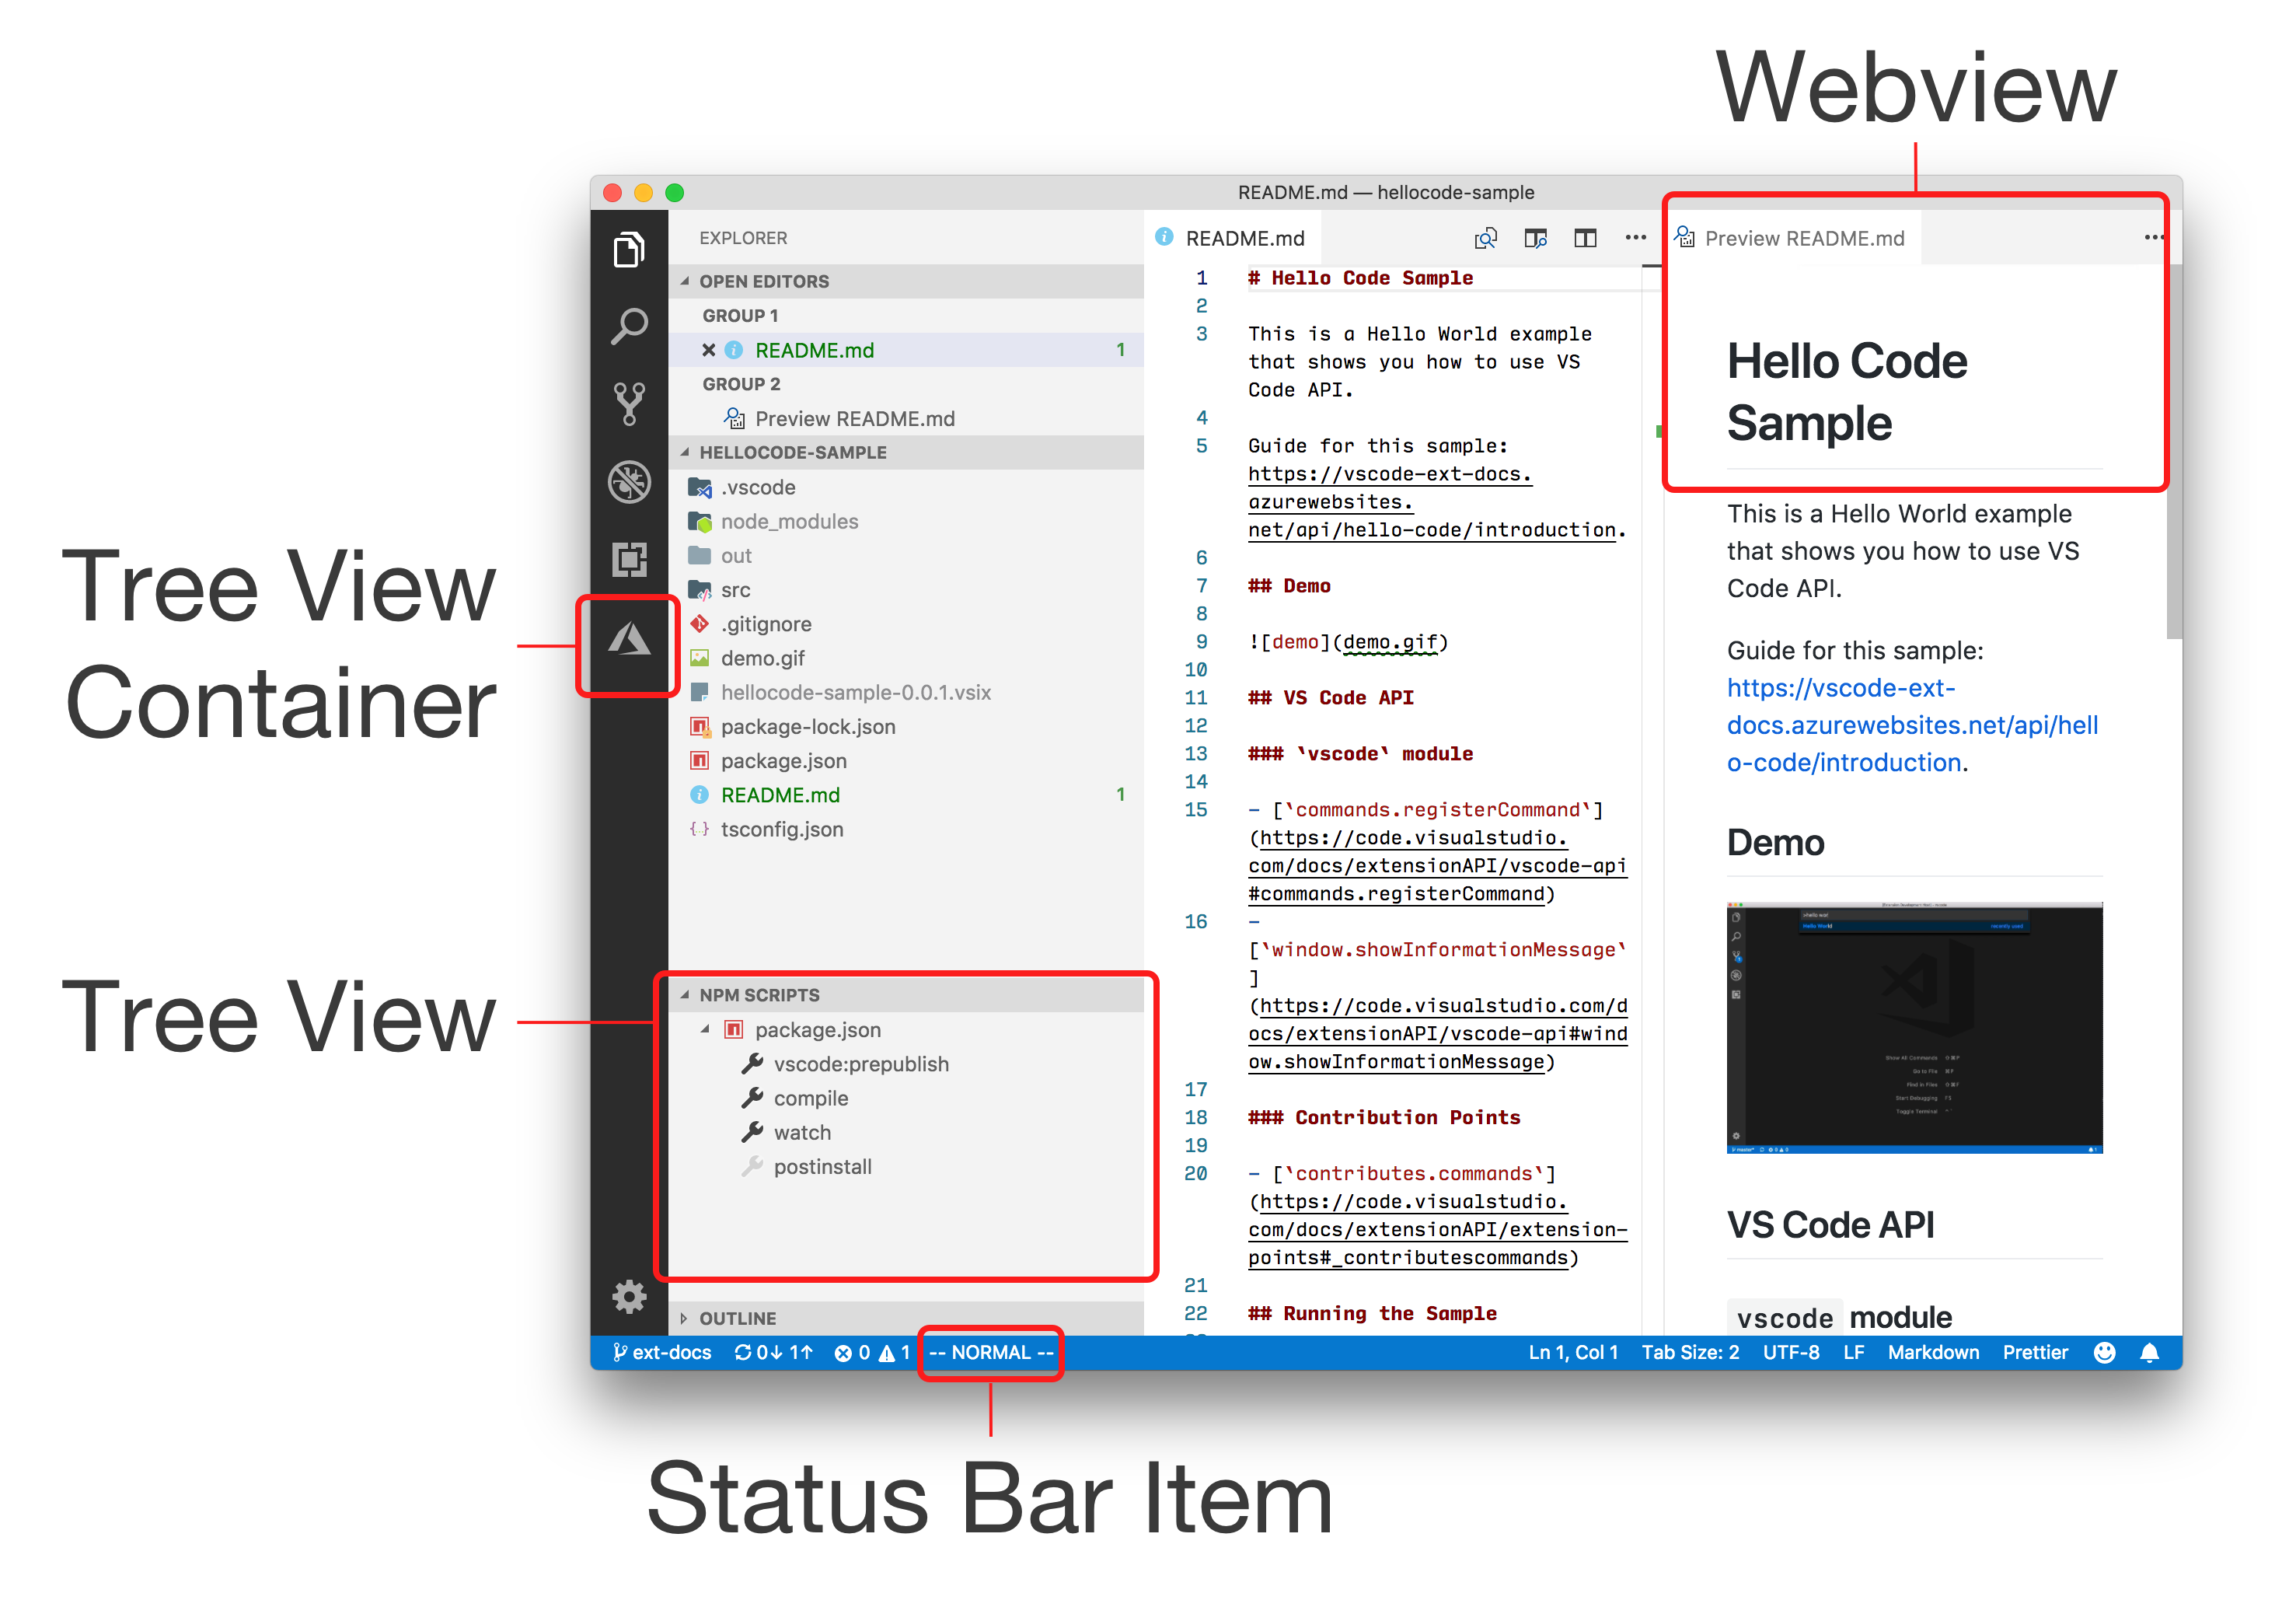
在创建新的显示区域之前,先要知道一下VS Code本身有哪些区域可以用来自定义
最左侧的是Tree View Container,这个就比较像快捷菜单
接着就是左侧的树型大纲视图,这里一般以大纲或者目录的形式显示一些辅助信息
最底下的就是状态栏,可以添加一些当前工程或者插件的状态信息,比如进度条等
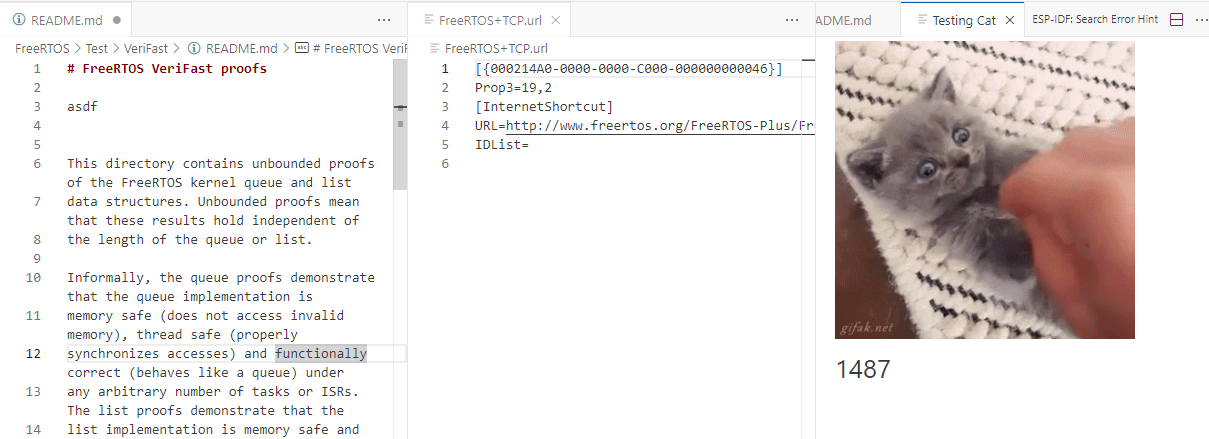
最右侧较大范围的就是Webview
Webview,页面视图,简单理解就是HTML中的一个iframe,可以嵌入一个页面进来,但是这个嵌入的页面是个相对安全的沙河,只有从外部控制Webview的内容,而Webview反向控制就比较困难。
所以一般可以通过Webview调用markdown、gpt、copilot等等第三方的交换界面
Webview在VS Code中,可以反向hook editor event,比如撤销、重做、保存,这样就让你在VS Code中实现一个某种编辑器成为可能。
Webview一般有三种用法:
- Webview Panels,一般的显示渲染结果的窗口
- custom editor,一个自定义的编辑器
- Webview views,大纲视图的二次开发
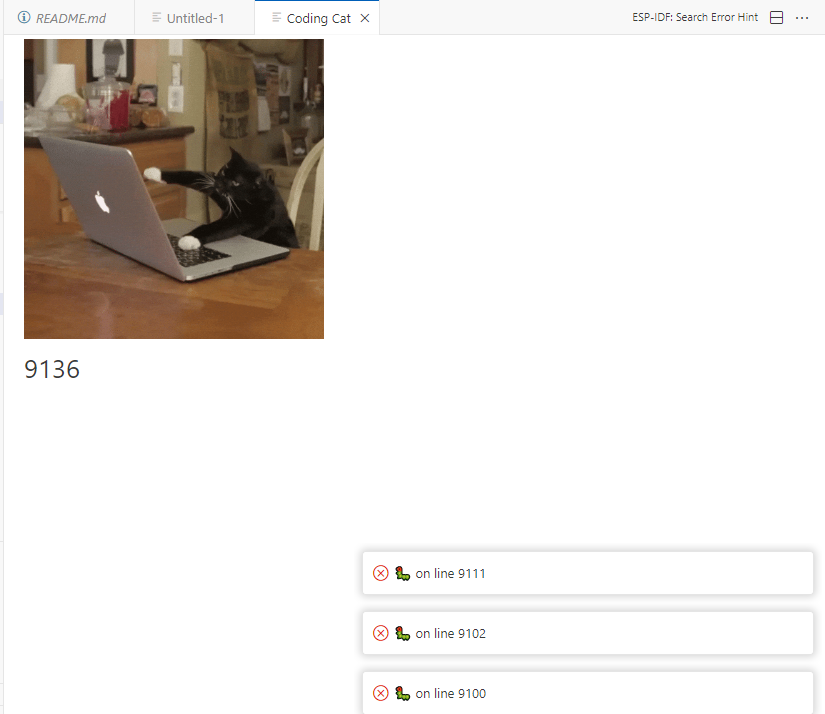
这里参考vscode-extension-samples\webview-sample的例子,看他是如何让小猫在webview中写代码的
export function activate(context: vscode.ExtensionContext) {
	context.subscriptions.push(
		vscode.commands.registerCommand('catCoding.start', () => {
			CatCodingPanel.createOrShow(context.extensionUri);
		})
	);
注册命令主要就是调用了这个CatCodingPanel的实例化
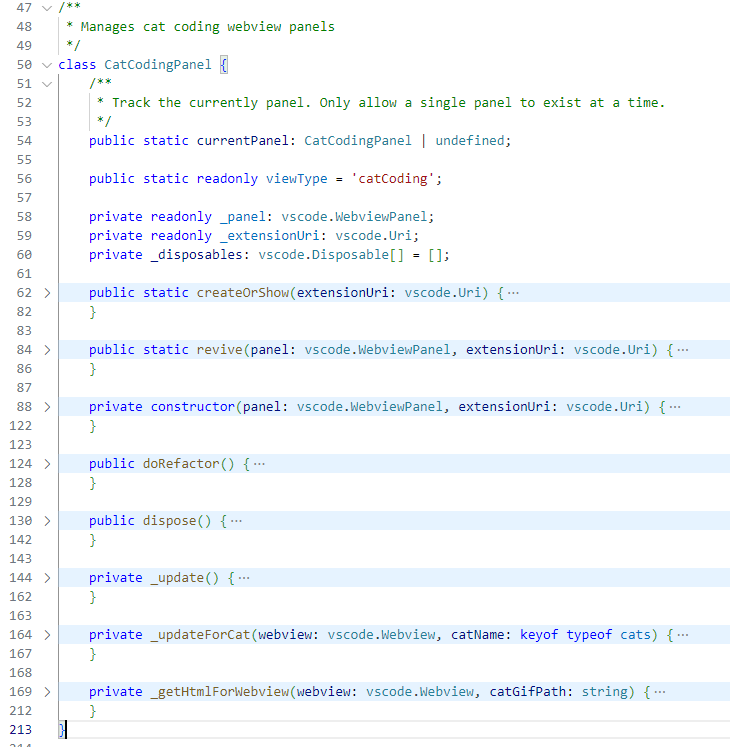
先缩起来看一下,CatCodingPanel这个类主要的几个方法,很明显的是CatCodingPanel使用的是vs的内部pannel对象vscode.WebviewPanel
		// Otherwise, create a new panel.
		const panel = vscode.window.createWebviewPanel(
			CatCodingPanel.viewType,
			'Cat Coding',
			column || vscode.ViewColumn.One,
			getWebviewOptions(extensionUri),
		);
停在接口上,就能很清晰看到4个参数的作用
function window.createWebviewPanel(viewType: string, title: string, showOptions: vscode.ViewColumn | {
    readonly viewColumn: vscode.ViewColumn;
    readonly preserveFocus?: boolean;
}, options?: vscode.WebviewPanelOptions & vscode.WebviewOptions): vscode.WebviewPanel
Create and show a new webview panel.

@param viewType — Identifies the type of the webview panel.

@param title — Title of the panel.

@param showOptions — Where to show the webview in the editor. If preserveFocus is set, the new webview will not take focus.

@param options — Settings for the new panel.

@return — New webview panel.
发现这个函数好像根本没有说具体内容是怎么显示出来的
那就看一下构造函数的内容
	private constructor(panel: vscode.WebviewPanel, extensionUri: vscode.Uri) {
		this._panel = panel;
		this._extensionUri = extensionUri;

		// Set the webview's initial html content
		this._update();

		// Listen for when the panel is disposed
		// This happens when the user closes the panel or when the panel is closed programmatically
		this._panel.onDidDispose(() => this.dispose(), null, this._disposables);

		// Update the content based on view changes
		this._panel.onDidChangeViewState(
			e => {
				if (this._panel.visible) {
					this._update();
				}
			},
			null,
			this._disposables
		);

		// Handle messages from the webview
		this._panel.webview.onDidReceiveMessage(
			message => {
				switch (message.command) {
					case 'alert':
						vscode.window.showErrorMessage(message.text);
						return;
				}
			},
			null,
			this._disposables
		);
	}
可以看到显示内容是靠update初始化的,最终调用到_getHtmlForWebview,这个里面基本上就是封装了一个HTML页面
onDidChangeViewState就可以认为是页面改动触发的刷新,比如分屏显示,缩小或者放大webview大小
onDidReceiveMessage添加了一个事件回调,收到某些命令时进行弹窗显示
Webview的生命周期
Webview是有一个生命周期的,并且Webview的句柄是需要你自己保存的,否则这个东西就没人可以控制了。
而Webview同样也需要正确释放,否则就会造成额外的错误
- constructor
- dispose
- revive/reveal 从后台切到前台显示,获得焦点
Debug
Developer: Toggle Developer Tools可以看到这个webview的界面,就能清楚的看到这里其实嵌入式了iframe

内部的网页就是cat coding

加载本地资源
function getWebviewOptions(extensionUri: vscode.Uri): vscode.WebviewOptions {
	return {
		// Enable javascript in the webview
		enableScripts: true,

		// And restrict the webview to only loading content from our extension's `media` directory.
		localResourceRoots: [vscode.Uri.joinPath(extensionUri, 'media')]
	};
}
需要注意在getWebviewOptions中的localResourceRoots中会限制可以读取的资源路径,比如这里就限制必须是在插件路径的media文件夹内才可以
		const scriptPathOnDisk1 = vscode.Uri.joinPath(this._extensionUri, 'giphy.gif');
		//const scriptPathOnDisk1 = vscode.Uri.joinPath(this._extensionUri, 'media', 'cat.gif');

		const scriptUri1 = webview.asWebviewUri(scriptPathOnDisk1);
如果后续读取使用的是非media路径,webview会显示不了对应的gif
通信
	context.subscriptions.push(
		vscode.commands.registerCommand('catCoding.doRefactor', () => {
			if (CatCodingPanel.currentPanel) {
				CatCodingPanel.currentPanel.doRefactor();
			}
		})
	);
	public doRefactor() {
		// Send a message to the webview webview.
		// You can send any JSON serializable data.
		this._panel.webview.postMessage({ command: 'refactor' });
	}
插件可以通过postMessage发送消息给实例化的webview,进而实现一些控制
    // Handle messages sent from the extension to the webview
    window.addEventListener('message', event => {
        const message = event.data; // The json data that the extension sent
        switch (message.command) {
            case 'refactor':
                currentCount = Math.ceil(currentCount * 0.5);
                counter.textContent = `${currentCount}`;
                break;
        }
    });
在media/main.js中可以看到对应事件的响应代码
反过来,webview也可以通过vs插件接口发送消息给插件
    setInterval(() => {
        counter.textContent = `${currentCount++} `;

        // Update state
        vscode.setState({ count: currentCount });

        // Alert the extension when the cat introduces a bug
        if (Math.random() < Math.min(0.001 * currentCount, 0.05)) {
            // Send a message back to the extension
            vscode.postMessage({
                command: 'alert',
                text: '🐛  on line ' + currentCount
            });
        }
    }, 100);
在media/main.js中可以看到webview加载的本地js直接调用了vs的api,进行post信息
显示markdown
非常简单直接使用内置的markdown命令实现显示当前激活文档的markdown渲染视图
vscode.commands.executeCommand("markdown.showPreviewToSide", vscode.window.activeTextEditor.document.uri.path);
不过这种方式只能显示一个markdown,而且具体markdown能显示啥,不能显示啥,或者说markdown的扩展,就不是我能控制的了
Summary
第二步ok
Quote
https://liiked.github.io/VS-Code-Extension-Doc-ZH/#/
https://code.visualstudio.com/api
https://stackoverflow.com/questions/39569993/vs-code-extension-get-full-path
https://zhuanlan.zhihu.com/p/693769416
https://www.cnblogs.com/liuxianan/p/vscode-plugin-webview.html
https://code.visualstudio.com/api/extension-guides/webview