Foreword
记录一下我搭建的嵌入式CI/CD流程
搭建环境
ubuntu 下安装SES流程
首先下载Linux版本的64-bit TGZ Archive,后续直接安装即可,没啥需要操作的
https://www.segger.com/downloads/embedded-studio/
wget https://dl2.segger.com/files/embedded-studio/Setup_EmbeddedStudio_ARM_v630_linux_x64.tar.gz
tar -zxvf Setup_EmbeddedStudio_ARM_v630_linux_x64.tar.gz
cd arm_segger_embedded_studio_v630_linux_x64
./install_segger_embedded_studio
然后直接启动SEGGER Embeded Studio For Arm 6.30,界面和Windows基本一模一样(缺少GUI的环境是无法正常安装的,所以一定要有X server之类的东西)
- 后续发现其实可以无GUI安装的,带上下面的参数就可以了
Installing SEGGER Embedded Studio on a headless server
================================================================================

Run "./install_segger_embedded_studio --copy-files-to installation_directory"
and follow the instructions.
进到这边就会发现,由于使用了外部编译器编译,所以缺少了必要的编译器,就要安装GNU Arm Embedded Toolchain的ubuntu版本
sudo apt-get update
sudo apt-get -y install gcc-arm-none-eabi
确定是否安装成功了
arm-none-eabi-gcc -v
Using built-in specs.
COLLECT_GCC=arm-none-eabi-gcc
COLLECT_LTO_WRAPPER=/usr/lib/gcc/arm-none-eabi/10.3.1/lto-wrapper
Target: arm-none-eabi
Configured with: ../configure --build=x86_64-linux-gnu --prefix=/usr --includedir='/usr/lib/include' --mandir='/usr/lib/share/man' --infodir='/usr/lib/share/info' --sysconfdir=/etc --localstatedir=/var --disable-option-checking --disable-silent-rules --libdir='/usr/lib/lib/x86_64-linux-gnu' --libexecdir='/usr/lib/lib/x86_64-linux-gnu' --disable-maintainer-mode --disable-dependency-tracking --mandir=/usr/share/man --enable-languages=c,c++,lto --enable-multilib --disable-decimal-float --disable-libffi --disable-libgomp --disable-libmudflap --disable-libquadmath --disable-libssp --disable-libstdcxx-pch --disable-nls --disable-shared --disable-threads --enable-tls --build=x86_64-linux-gnu --target=arm-none-eabi --with-system-zlib --with-gnu-as --with-gnu-ld --with-pkgversion=15:10.3-2021.07-4 --without-included-gettext --prefix=/usr/lib --infodir=/usr/share/doc/gcc-arm-none-eabi/info --htmldir=/usr/share/doc/gcc-arm-none-eabi/html --pdfdir=/usr/share/doc/gcc-arm-none-eabi/pdf --bindir=/usr/bin --libexecdir=/usr/lib --libdir=/usr/lib --disable-libstdc++-v3 --host=x86_64-linux-gnu --with-headers=no --without-newlib --with-multilib-list=rmprofile,aprofile CFLAGS='-g -O2 -ffile-prefix-map=/build/gcc-arm-none-eabi-hYfgK4/gcc-arm-none-eabi-10.3-2021.07=. -flto=auto -ffat-lto-objects -fstack-protector-strong' CPPFLAGS='-Wdate-time -D_FORTIFY_SOURCE=2' CXXFLAGS='-g -O2 -ffile-prefix-map=/build/gcc-arm-none-eabi-hYfgK4/gcc-arm-none-eabi-10.3-2021.07=. -flto=auto -ffat-lto-objects -fstack-protector-strong' DFLAGS=-frelease FCFLAGS='-g -O2 -ffile-prefix-map=/build/gcc-arm-none-eabi-hYfgK4/gcc-arm-none-eabi-10.3-2021.07=. -flto=auto -ffat-lto-objects -fstack-protector-strong' FFLAGS='-g -O2 -ffile-prefix-map=/build/gcc-arm-none-eabi-hYfgK4/gcc-arm-none-eabi-10.3-2021.07=. -flto=auto -ffat-lto-objects -fstack-protector-strong' GCJFLAGS='-g -O2 -ffile-prefix-map=/build/gcc-arm-none-eabi-hYfgK4/gcc-arm-none-eabi-10.3-2021.07=. -fstack-protector-strong' LDFLAGS='-Wl,-Bsymbolic-functions -flto=auto -Wl,-z,relro' OBJCFLAGS='-g -O2 -ffile-prefix-map=/build/gcc-arm-none-eabi-hYfgK4/gcc-arm-none-eabi-10.3-2021.07=. -flto=auto -ffat-lto-objects -fstack-protector-strong' OBJCXXFLAGS='-g -O2 -ffile-prefix-map=/build/gcc-arm-none-eabi-hYfgK4/gcc-arm-none-eabi-10.3-2021.07=. -flto=auto -ffat-lto-objects -fstack-protector-strong' INHIBIT_LIBC_CFLAGS=-DUSE_TM_CLONE_REGISTRY=0 AR_FOR_TARGET=arm-none-eabi-ar AS_FOR_TARGET=arm-none-eabi-as LD_FOR_TARGET=arm-none-eabi-ld NM_FOR_TARGET=arm-none-eabi-nm OBJDUMP_FOR_TARGET=arm-none-eabi-objdump RANLIB_FOR_TARGET=arm-none-eabi-ranlib READELF_FOR_TARGET=arm-none-eabi-readelf STRIP_FOR_TARGET=arm-none-eabi-strip SED=/bin/sed SHELL=/bin/sh BASH=/bin/bash CONFIG_SHELL=/bin/bash
Thread model: single
Supported LTO compression algorithms: zlib
gcc version 10.3.1 20210621 (release) (15:10.3-2021.07-4)
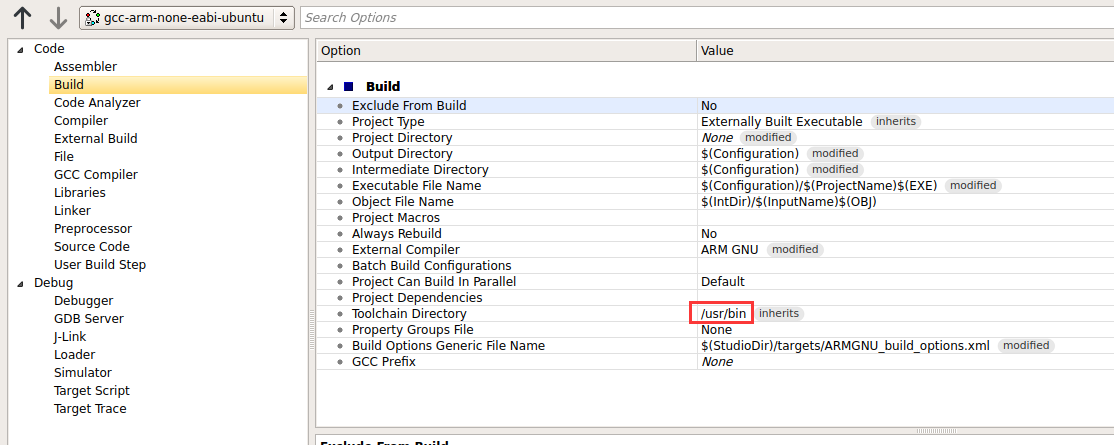
修改IDE的外部编译器的位置
/usr/bin
编译测试
基本没什么问题了,只有几个脚本是之前用bat写的,可能这次需要修改成shell的了
命令行编译测试
ubuntu中安装完ses以后,默认的emBuild是没有添加到环境变量中的,所以需要指定路径运行
首先清空编译残留,然后重新编译
/usr/share/segger_embedded_studio_for_arm_6.30/bin/emBuild  -config configName1 ./test.emProject -clean -echo
/usr/share/segger_embedded_studio_for_arm_6.30/bin/emBuild  -config configName2 ./test.emProject -rebuild -echo
如果不带echo,很多命令执行了没有返回,不知道具体是什么情况,所以最好带上echo
-verbose
如果只是看要执行的命令,而不执行可以用show
-show
基本到这里,剩下就是配合脚本实现自动编译即可
这里遗留了一个小问题,emBuild编译是否成功没有判断,无法直接从返回值里获取到,所以增加了判断
bin="test.bin"

cur_config="test1"
compile_cmd="/usr/share/segger_embedded_studio_for_arm_6.30/bin/emBuild  -config "$cur_config" ./test.emProject -rebuild -echo -verbose"
#echo $compile_cmd
ret=`eval $compile_cmd`
#echo $ret
if [[ $ret =~ $bin ]]
then
	echo "release bin"
	# push or encrypt bin
else
	echo "no bin release"
fi
Jenkins
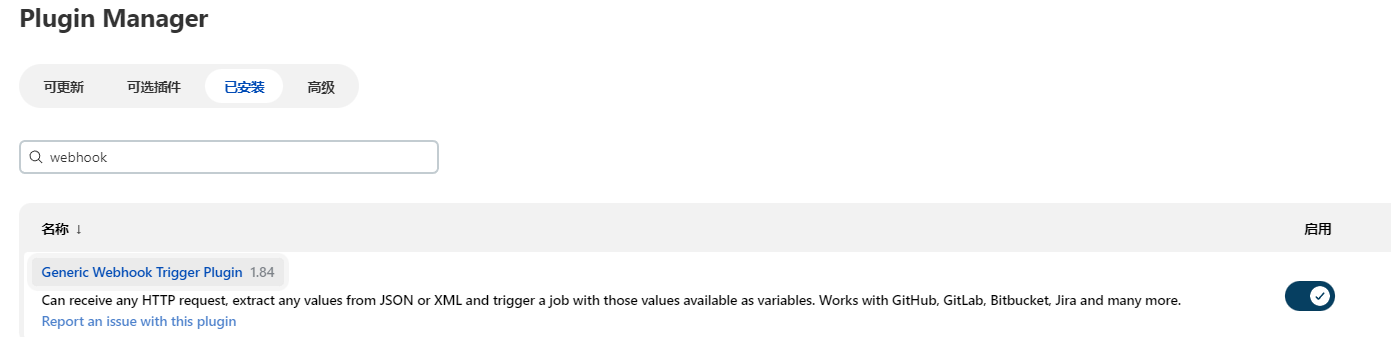
由于是从coding过来的,Jenkins的coding插件还过期不能用了。看了一下coding改用通用插件来对接Jenkins了,也就是generic-webhook-trigger
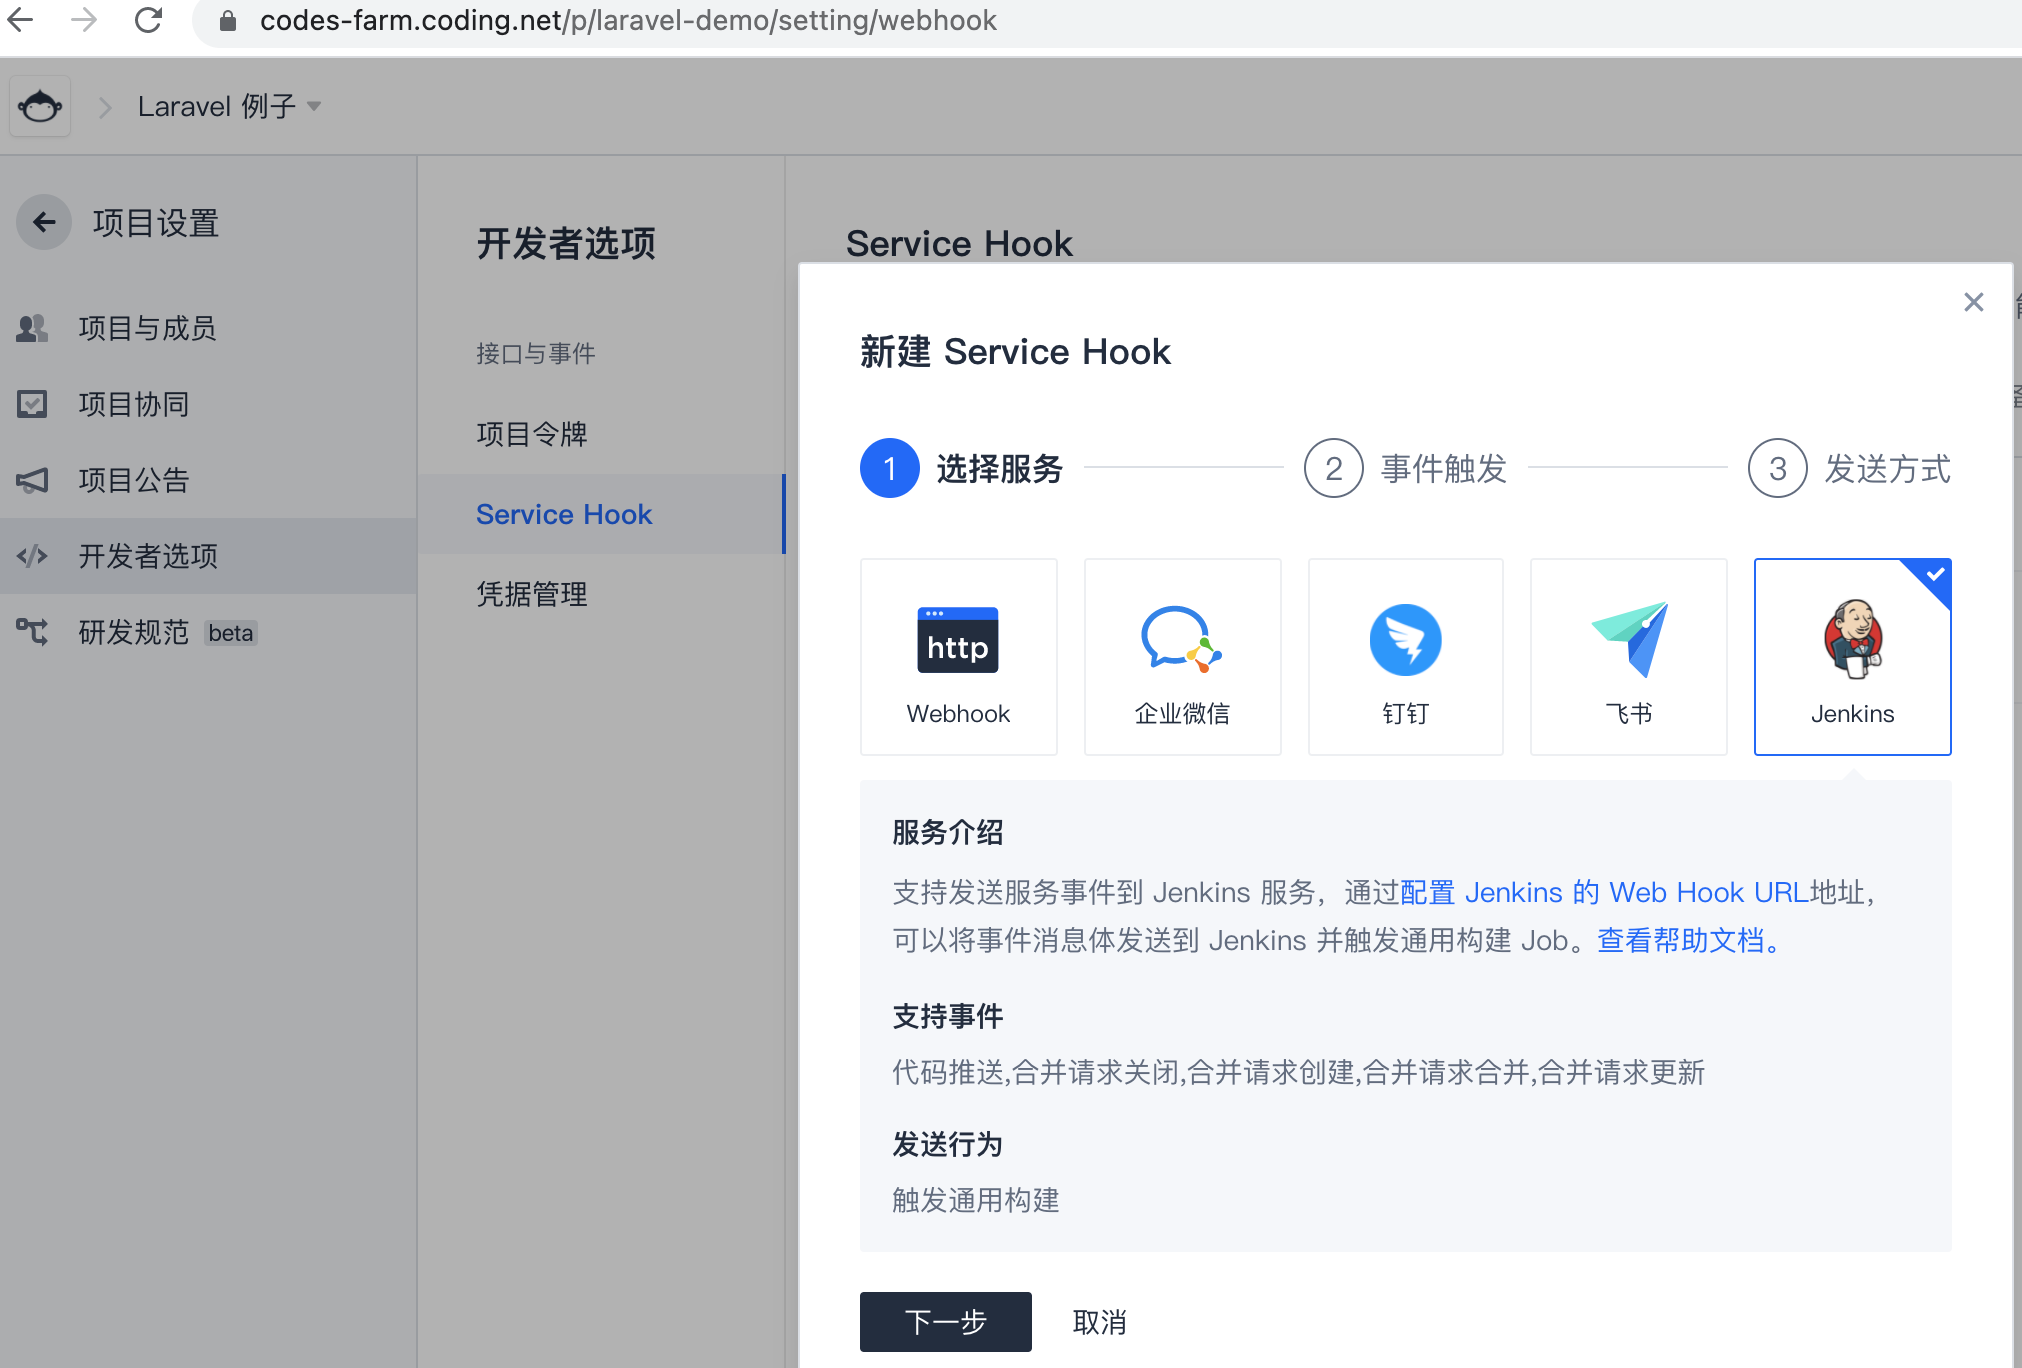
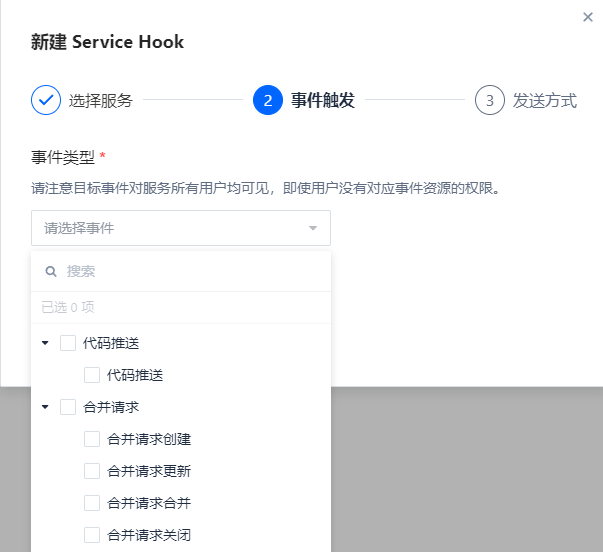
唯一的问题是,Hook这里只有这么几种情况可以设置,其他细节可能得靠参数请求头之类的东西去实现了,但是coding给的参数又不是很多,总体不是很好用。
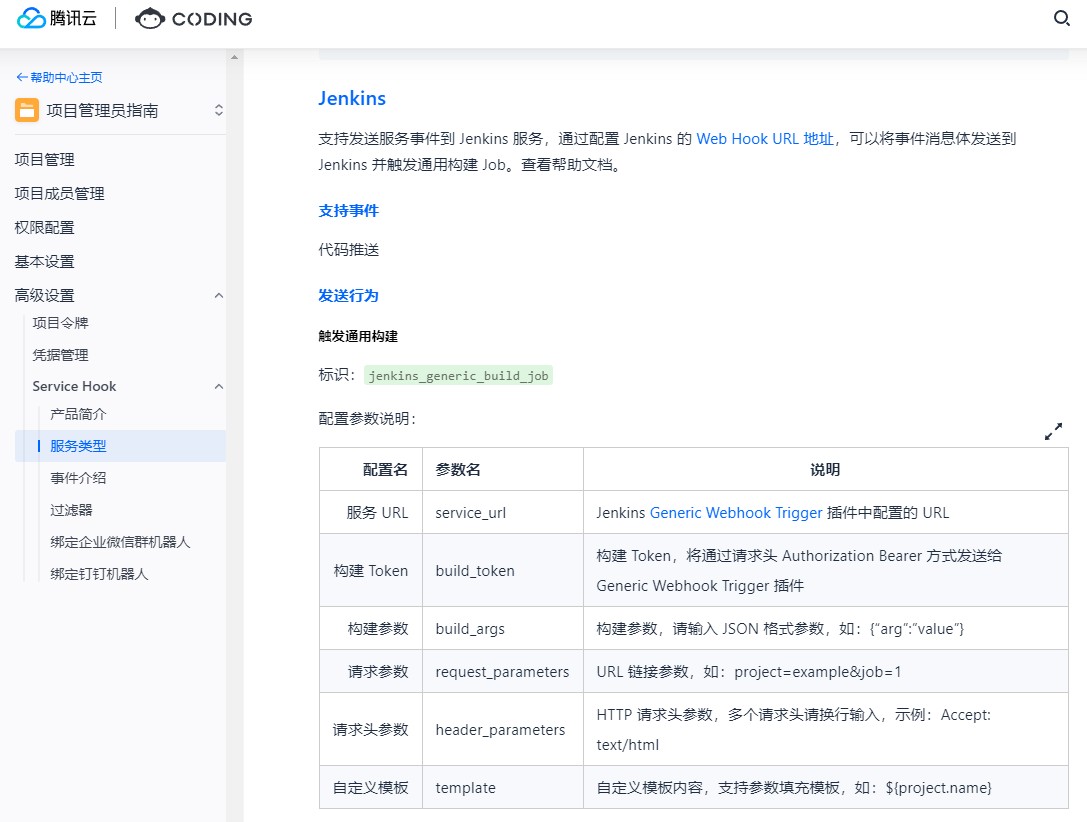
Jenkins这边主要是把路径给过去,然后把token两边填一致,再把coding账号信息输入进去,保存一下设置

由于是嵌入式项目,所以没有SES可以用的插件,需要靠脚本去实现后续的编译和release
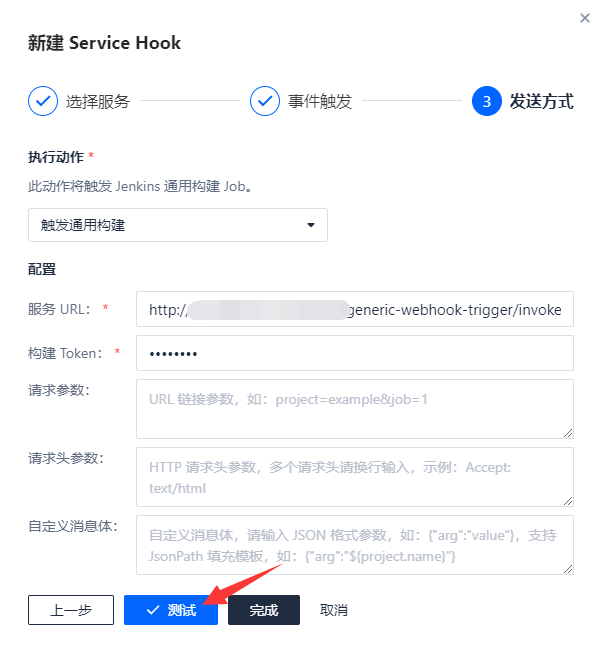
再切回到了coding这边,点击测试,就能看到已经触发了Jenkins
release
Jenkins是连接SSH到VPS,然后执行以下操作进行的代码更新和release
cd repository
git checkout .
git checkout -B TargetBranch
git pull origin TargetBranch
git submodule update --init --recursive
./release.sh TargetBranch
完整的release.sh 脚本就在这里了
bin="test.bin"
cur_path=$1
#echo $cur_path
cur_tag=`git describe --tags --always --abbrev=0 HEAD`

cur_config="test_config"
compile_cmd="/usr/share/segger_embedded_studio_for_arm_6.30/bin/emBuild  -config "$cur_config" ./test.emProject -rebuild -echo -verbose"
#echo $compile_cmd
ret=`eval $compile_cmd`
#echo $ret
if [[ $ret =~ $bin ]]
then
	echo "release bin"
	# push and excrypt
	python3 ../test_encrypt/bin_encrypt.py $cur_config"("$cur_tag").bin"
	python3 push.py
else
	echo "no bin release"
fi
遗留问题
首先,就是Jenkins这里没办法反馈每个环节的状态,比如这个代码是编译报错了,还是加密报错了,还是提交报错了,这个CI进度只有启动和完成,中间的部分看不到。
当然可以通过把脚本拆开,分步执行来区分各个环节,但是由于流程比较简单,拆开了又有点蠢,就放着了
还有一种方式是直接在Jenkins内部执行,安装SES,并且拉取代码,然后运行编译,类似Github,不过这种做成docker img 可能更方便一些
(这样有一个大问题,emBuild需要桌面的环境,而docker里基本不可能包含这玩意,安装起来十分麻烦,而且每次都重新构建环境,完全浪费内存,不如直接交给VPS完成就算了)
还有一个问题,通过这种方式建立的CI流程,由于本地使用的是同一个代码,所以无法实现多个Task同时CI,如果要多个Task,建议先把本地代码仓库多clone几个,然后各自用各自的,防止同时CI的时候互相干扰。
Summary
再总结一下整体流程,代码coding完了以后,push到自动CI的分支上,然后触发Jenkins,执行编译脚本,编译脚本中会进行各种文件打包和bin加密,再通过发布API,将打包好的文件上传。这样一次CI就完成了,CD是交给实际使用的人去部署,这里没有自动部署一说。
后续还更新的话,继续补充
Quote
https://forum.segger.com/index.php/Thread/5927-SOLVED-Using-segger-studio-project-in-Jenkins/
https://studio.segger.com/index.htm?https://studio.segger.com/emBuild.htm
https://github.com/josschne/ses
https://installati.one/ubuntu/22.04/gcc-arm-none-eabi/